We offer you the the last, third part of the description of the procedure of connecting the detector (sensor) GGreg20 in combination with the main controller ESP8266 or ESP32 to the Home Assistant server via the ESP Home plug-in.
Second part of the description, see the link: Connecting the GGreg20_V3 Radiation Sensor to the Home Assistant Server via ESP Home Integration – part 2
Note . This publication is suitable for all versions of the ionizing radiation detector manufactured by IoT-devices: GGreg20_V1, GGreg20_V2, GGreg20_V3
Since the entire line of these detectors is focused on the SBM-20 tube, all versions of the devices have the same algorithm and coefficients for calculating the power level and dose of ionizing radiation.
The accuracy of the measurement is affected only by the individual properties of the SBM-20 tube installed in each GGreg20_V3 detector. The specifications of the tube manufacturer indicate a limit range of measurement accuracy of 20% . On practice, this means that two identical GGreg20 devices, but with different SBM-20 tubes, can give results (not more than) with the specified deviation in the number of pulses.
Steps to connect GGreg20 to Home Assistant – continued.
Step 8. Check the log of the new ESP8266 controller with GGreg20 connected
Step 9. Check for new entities on the server side
Step 10. Add GGreg20 radiation sensor widgets to the Dashboard
Step 11. Add a push notification automation script to the Home Assistant application for crossing thresholds
Entities and values of the device on the server
Step 8 . Check the log of the new ESP8266 controller with GGreg20 connected
Here is an example of an active device console with GGreg20 and yaml settings similar to the ones we developed above.
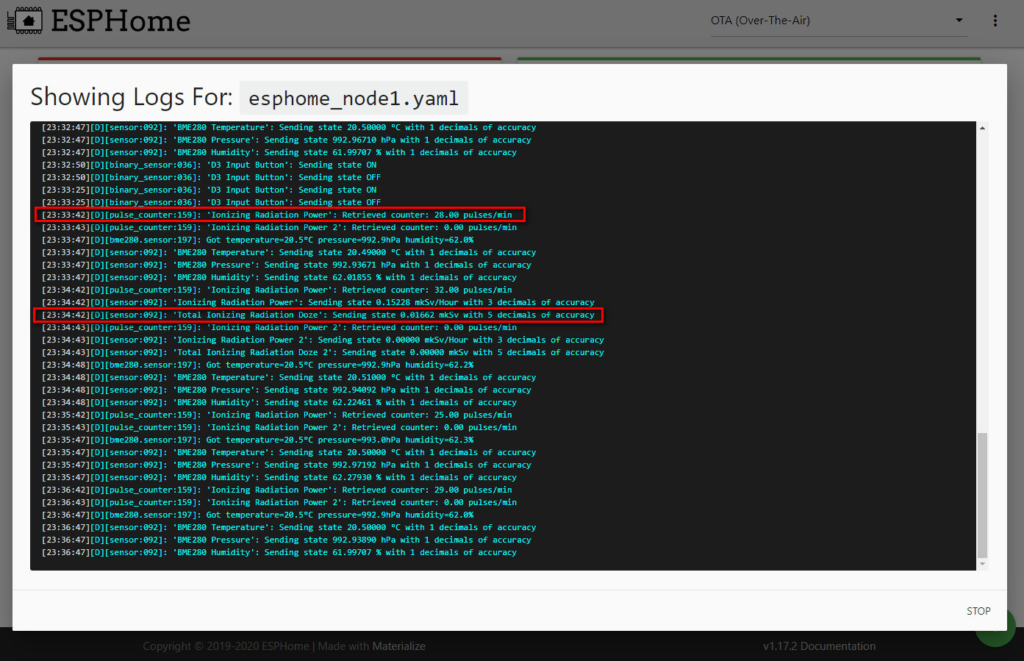
Fig. Output to the device console (Logs) via the ESP Home interface
Step 9 . Check for new entities on the server side
There are two ways to verify that the corresponding GGreg20 entities are formed in the ESP Home plug-in and that the Home Assistant server sees them:
- go to the Developer Tools menu on the sidebar of the Home Assistant interface and search for the relevant data as shown in Fig.
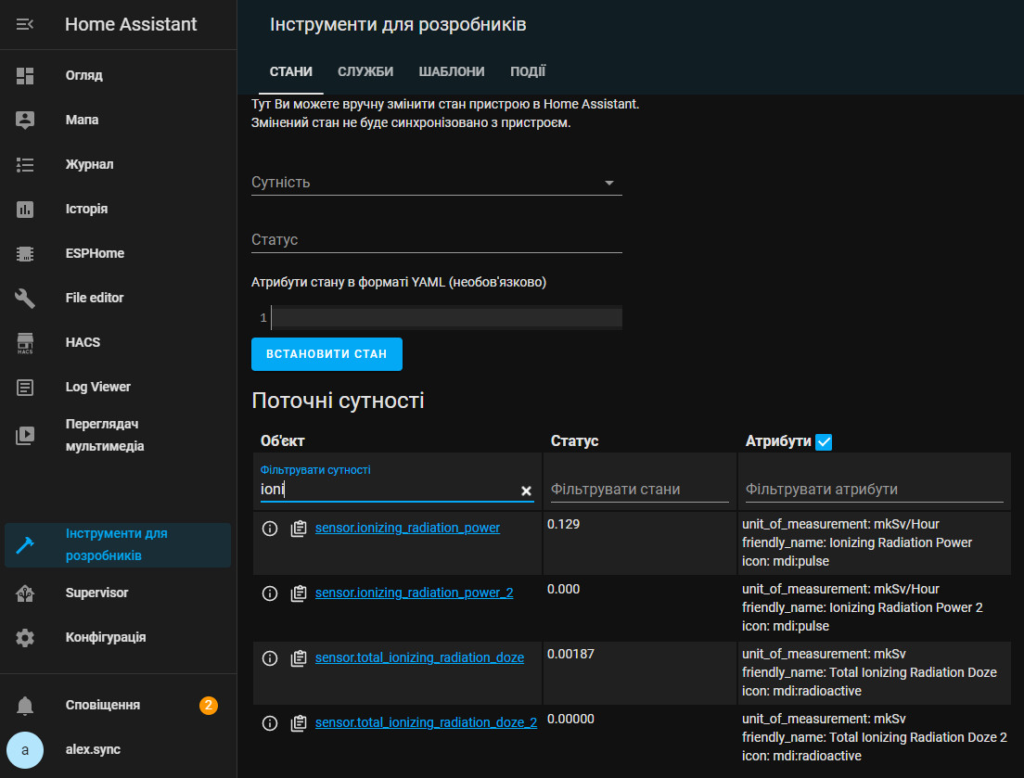
Fig. Find the right entities through the Developer Tools menu
- or go to the menu Configuration -> Integration and search as shown in the following figures.
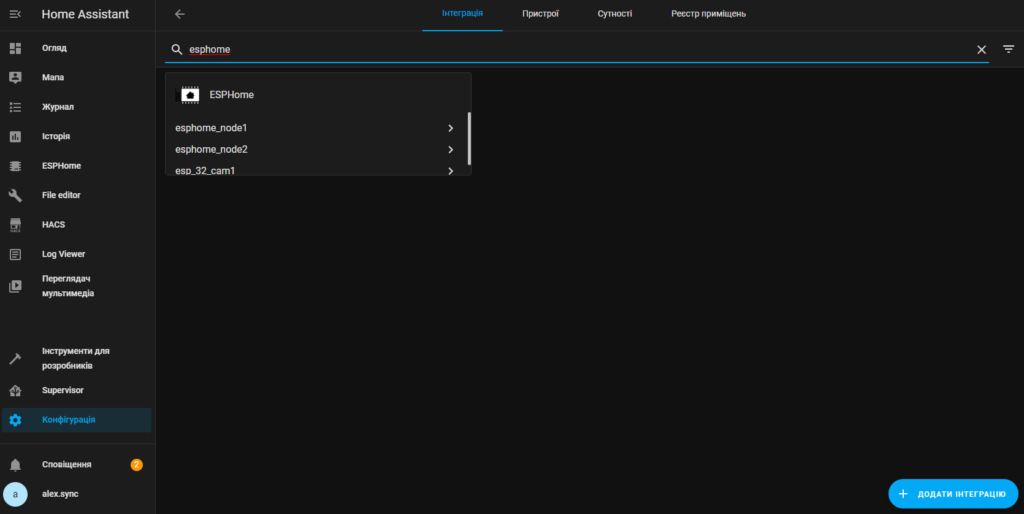
Fig. Search for the desired entities through the menu Configuration -> Integration
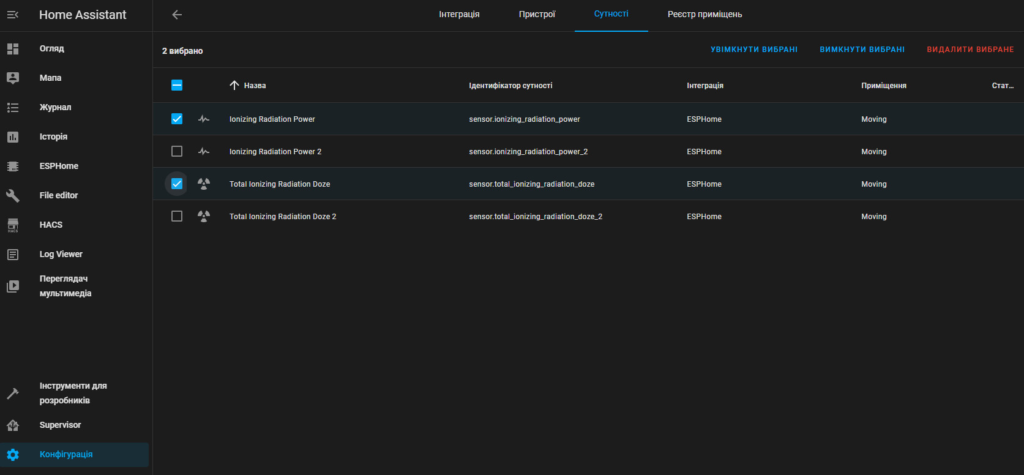
Fig. Search for the required entities through the menu Configuration -> Integration : Devices / Entities
Visualization and Automation
Step 10 . Add GGreg20 radiation sensor widgets to the Dashboard
Here is an example of a demo tab from an active server for two devices GGreg20_V1 and GGreg20_V3 located in different coordinate axes. Each device uses the same yaml file as we created above.
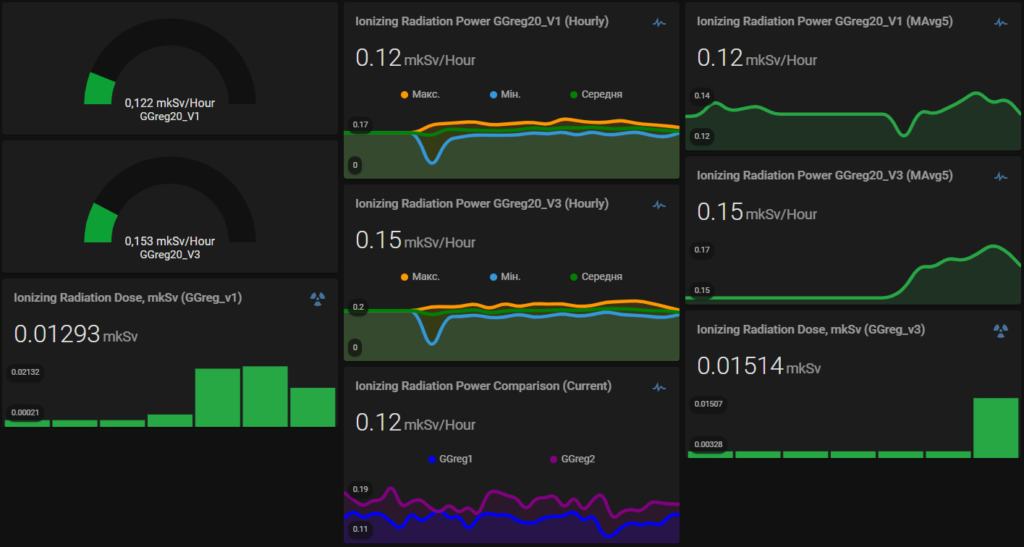
Fig. The dashboard shows widgets with radiation level data from two sensors GGreg20_V1 and GGreg20_V3 located on different coordinate axes.
Step 11 . Add a push notification automation script to the Home Assistant application for crossing thresholds
Once we have made sure that the new device works and sends reliable data, it is possible to move on to the main task – Automation. This powerful tool is available to the administrator through the menu Configuration -> Automation.
Because the entities with the power and dose of ionizing radiation created by ESP Home are available through all components and functions of Home Assistant, the administrator can create any events, functions, scenarios with their use.
For example, it is possible to create an automated exceeding notification of the normal power threshold of ionizing radiation with a message on a smartphone. And so on.
However, these topics go far beyond this publication and we do not have the opportunity to consider them here.
Conclusions
In parts one and two , we covered the steps
Server
Step 1. Install (or start) the Home Assistant server
ESP Home plugin for Home Assistant
Step 2. Connect the ESP Home extension for the Home Assistant server via the Supervisor -> Add-on Store menu
YAML-config of the new ESP device with GGreg
Step 3. Download the ready example of a batch yaml-configuration file of the GGreg20_V3 device for ESP8266 from our website
Step 4. Create (based on the example) in ESP Home the appropriate yaml configuration file
Hardware connection GGreg20_V3 and controller
Step 5. Select the GPIO pin on the controller that will register the pulses from GGreg20
Step 6. Connect the GGreg20_V3 radiation detector to the ESP8266 controller via the Out connector to the selected GPIO of the controller
Flashing the ESP device with GGreg
Step 7. Build and write firmware for the controller
Next, we performed the following steps to connect GGreg20 to Home Assistant:
Step 8. Check the log of the new ESP8266 controller with GGreg20 connected
Step 9. Check for new entities on the server side
Step 10. Add GGreg20 radiation sensor widgets to the Dashboard
Step 11. Add a push notification automation script to the Home Assistant application for crossing thresholds
We have considered in detail the easiest way to connect the GGreg20 detector with the ESP8266 controller to the Home Assistant server with the ESP Home plug-in.
And we made sure that it is not difficult at all, because all the work for us is performed by :
- Detector GGreg20_V3 – Immediately registers the pulses and transmits them to ESP8266;
- ESP Home plugin – provides an interface for building firmware and programming ESP8266;
- Ready-to-use yaml-file frees us from self-writing guidelines for sensor GGreg20;
- The Home Assistant server allows us to conveniently connect, administer and receive information from any of our devices.
That’s all. Good luck!